Are you confused about the different shooting modes in your Nikon Coolpix B500? Well in this blog I am gonna guide you through all the shooting modes in detail in the Nikon Coolpix B500 Camera.
Table of Contents
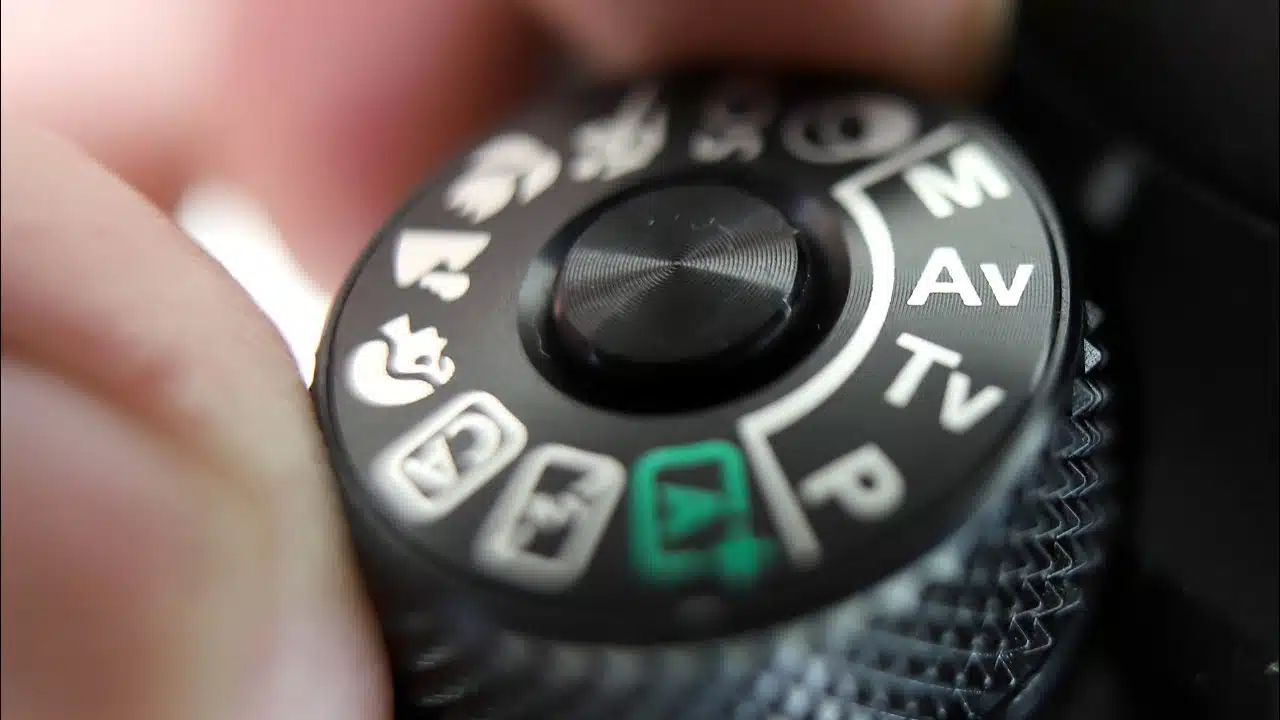
Camera Modes on DSLR
Auto Mode
I use the Auto Mode most often Because this is the only mode that allows setting ISO, focus, release mode, and white balance manually. Plus you can use the macro mode, Self-timer, Flash, And exposure compensation too. You can count on this mode most of the time. I really like using this mode because it allows you to manually set most of the options available in the camera.
Short Movie Show Mode
The Short Movie Show Mode in Camera automatically merges the clips recorded in the camera into a 30-second video. It is hence mostly used for videos but you can also click photos. From the menu, you can select the number of clips you want to record and merge. If you want a preset for the video you can use any of These presets will also reflect in the photos. If you want to set background music for your clip, you can select any of them Press zoom to listen. If you want to end your recording midway, If you want to end it after say five clips and combine only those, you can end the recording with a button.
Smart Portrait Mode
Smart Portrait is obviously used for portraits. You can press the button to the right of OK And apply a bunch of effects to your portrait in-camera. You can press this button to the left of OK and set a smile timer, Meaning the camera will click as soon as the subject smiles Or self-collage to make a collage in-camera. You can also use Camera flash in this mode
Creative Mode
In creative camera mode, you can click my images in five different presets at the same time. You can choose the filter you want by pressing the OK button. There are so many filters to choose from with different available presets.
Sports Mode
The Nikon Camera has a Sports Mode which is useful for fast action photography that may require high shutter speeds. It gives you a continuous release mode meaning the camera will keep clicking images as long as the shutter release button is pressed. This reduces camera shake to an extent and therefore as the name suggests, these camera modes are used for sports, wildlife, bird, and also street photography.
Backlighting Mode
Backlighting Mode is good for backlit subjects meaning when there is less or no light on the subject’s face And light falls on the back of its head, The camera will ask you to raise the flash Do that and click But if you cannot use the flash or you want to avoid the flash. For example, if you are clicking a landscape or a street photo where the flash will not be able to hit the subject, Go to the menu > HDR and turn it on and then shoot pictures.
Night Portrait Mode
As the name suggests Night Portrait mode is used for low light portraits. As soon as you select it, you have to use the flash. Also, go to the menu > Night Portrait And choose Handheld if you are shooting without a tripod and Tripod if you are using one for better quality and Stability.
Night Landscape Mode
Night Landscape is very useful for night photography. It has given some very cool street shots of the night. There also you need to go to the menu and tell the camera if you have a tripod or not.
Scene Mode
Scene Mode has many different options. We’ll go through them in brief. First is Portrait, useful obviously for portrait photography You can use the flash here.
The landscape is useful for landscape photography. Gives a deep depth of field. Multiple Exposure Lighten is useful for slow shutter photography like light trails, star trails Do give it a try.
Party Indoor to set the party mood Helps in stabilizing those dance moves Beach for a beach scene.
Snow for snow landscape Sunset Dusk/Dawn You may also use the Landscape mode for these.
I guess Close-up for macro photography but I don’t like this mode much Because the camera doesn’t allow me to use the flash there.
Food for food photography. Fireworks, Easy Panorama, Pet Portrait – this doesn’t allow me to use the flash so that I don’t confuse my pets with the flashlight.
Moon Mode to zoom in for moon photography Bird Watching for birds obviously. And you can set your image dimensions there, I always use the best quality.
For each of these modes, go to the Setup menu > Photo VR Turn it off if you have a tripod, or else it can be on.
Scene Auto Selector Mode
Scene Auto Selector method recognizes the shooting conditions and selects a scene automatically for you. If you are confused between the different scene modes and don’t know which one to pick You can select this mode and let the camera take care of it.
Conclusion
So guys these are the various shooting Camera modes in the Nikon Coolpix B500. So go and experiment with all these modes guys and click as many images as you can. I personally prefer the Auto Mode because it gives me maximum control over my settings. But it may not work for you, something else may work for you, figure it out. It is your camera, have fun with it and if you like this blog and found it to be useful give me a big thumbs up Leave a comment down below.

The auto mode works best for me . I’m not much into it. But yeah now Im gonna try all different modes for demanding situation.
Manual Mode Works Best if you know to tune it better.
My camera has a pro mode , it’s like a manual mode. You can take amazing click from there if you know we’ll to play with the settings.
I am a professional photographer and I don’t know why I’m reading this but I love when you put up new articles to explain basic things like this and maybe I’ll pick up or explain something better when I’m teaching a new person that’s getting into photography.