Exposure, Aperture, shutter speed, and ISO can be the difference between a crisp, eye-catching photo and a blurry, dimly-lit failure.
keep in mind what we’re trying to do is balance each side of the exposure aperture shutter speed iso in order to get a well-balanced exposure. so let’s think about the balancing of the triangle in shutter speed and aperture terms.
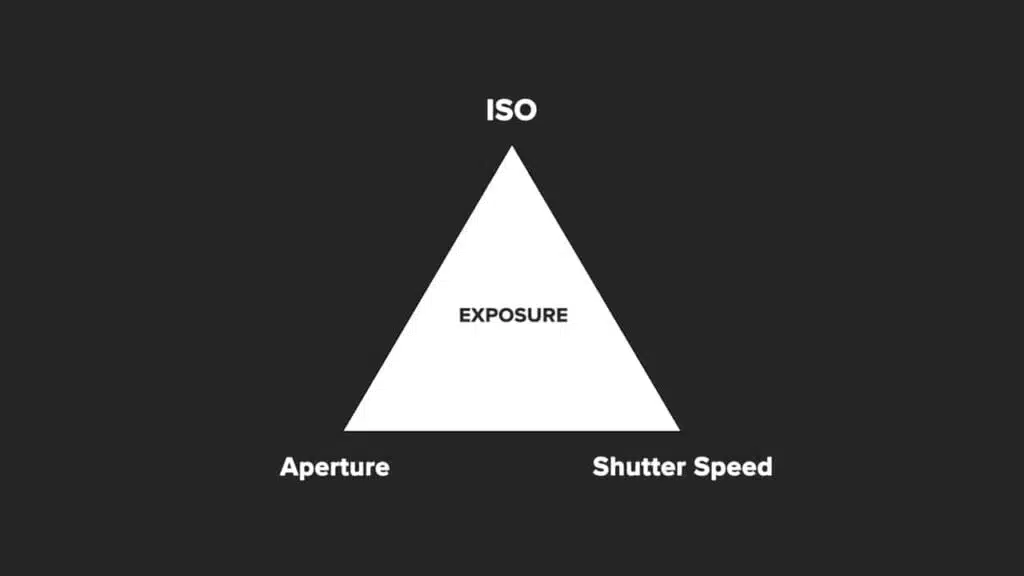
Table of Contents
- More Light vs. Less Light: Shutter Speed and Aperture Terms
- Shooting a Portrait with Wide Aperture
- Shooting with a Tight Aperture
- How ISO Interacts with Aperture and Shutter Speed
- How Do You Know If You’re Getting the Right Exposure?
- Using the Light Meter for Better Photos
- Adjusting for Brightness
- Capturing Motion with ISO
- Keeping the Exposure Triangle in Harmony
More Light vs. Less Light: Shutter Speed and Aperture Terms
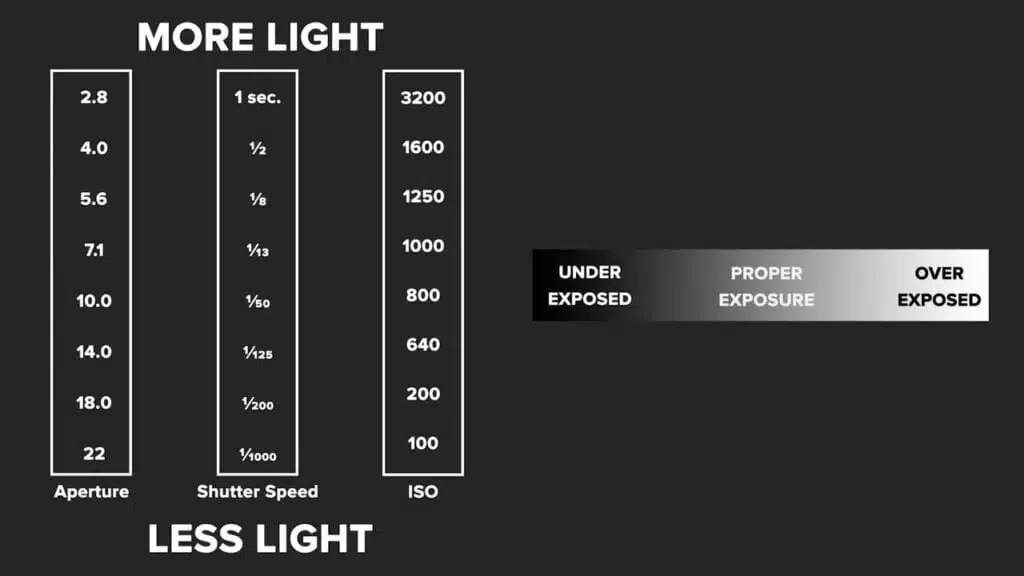
Let’s make this about more light versus less light. so you can’t just have a very slow shutter speed meaning we’re getting a lot of light in and then having a really big aperture opening because we’re flooding the camera with light. we have to balance those two, at the same token on the other side we can’t have a very fast shutter speed meaning we’re not letting a lot of light in, and then a very tiny aperture opening where we’re not letting any light in either.
so how do we balance those things?
Shooting a Portrait with Wide Aperture
well if you want to shoot say a portrait and have that beautiful blur and you shoot with a very wide opening at say 2.8 now you’ve got a big opening you’re getting a lot of light in right now. how do I balance that against the shutter well I make it faster right I cut off some of that amount of time that the light is hitting or going passing through that opening so that I balance out the exposure the opposite way?
Shooting with a Tight Aperture
I’m shooting a very tight aperture opening I’m trying to get everything in focus so I’m not letting a lot of light in through the opening, so I need to let more time for light to pass through that opening shooting with a slower shutter speed.
How ISO Interacts with Aperture and Shutter Speed
Now the way that iso will interact with these is sometimes you’re going to be in a low light situation for instance where you have to shoot with a very wide aperture and a somewhat slow shutter speed and that still might not give you what you need in order to capture the image with enough light so you might have to tweak that iso up in order to let more light in the camera the goal is for all three things to be in balance everything’s got to be in balance and in harmony in order to get the great and perfect exposure.
How Do You Know If You’re Getting the Right Exposure?
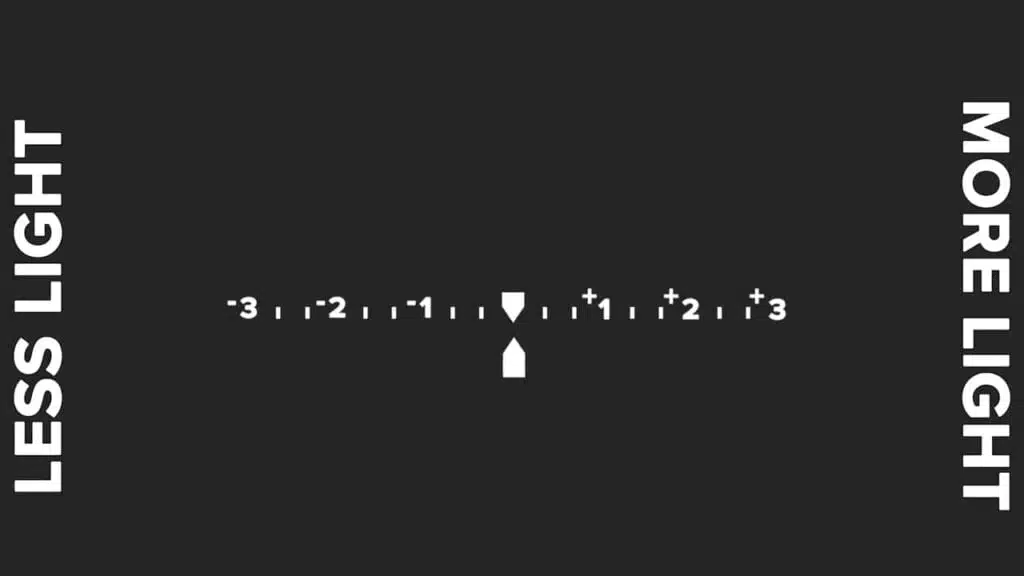
So how do you know if you’re getting the right exposure what you want to do is you’re going to pick up your camera turn it on and you’re going to pick something to take a picture of you’re going to look through the viewfinder find that thing that you want to take a picture of and then half-press the shutter button what happens is a bar is going to pop up along the bottom of the viewfinder and you’re going to see a little arrow and it’s going to go left and right depending on what you point your camera and focus on now if it goes to the left into the negative territory that means your settings are tuned so that the camera is going to shoot something dark if the arrow goes to the right of the middle area that means your camera settings are showing that it’s going to be a bright image what you want to do is play a game where we get the arrow in the middle so that you have a balanced exposure.
Using the Light Meter for Better Photos
Let’s use one example of how you’re going to use this light meter to get the picture you want to say I’m taking that portrait of my friend right across from me and I’ve decided because I want that really nice shallow depth of field and that blur behind him or she that I’m going to shoot with like a 2.8 the max aperture available on my lens so I put the lens on I’m shooting I have it on 2.8 my iso is at 100 where I want to keep it low as possible and like I said before you’re going to half-press when you find your focal point you’re going to half-press this that allows your camera to start the metering mode now you’re going to keep it half-pressed as you keep it on your subject and it’s going to show you are I in the negative I am in the plus side and it’s going to give you a good base for which way you need to go.
Adjusting for Brightness
Now if I’ve decided that my aperture is going to stay at 2.8 and the meter is showing me that I’m too bright what do I do next well I’m going to take my finger off the shutter and I’m going to use the shutter wheel to make my shutter speed faster meaning less light right because right now I’m too bright so I need to cut off some of that light now the opposite is true if I’m shooting 2 8 and it’s showing me that I don’t have enough light then I’m going to try to slow my shutter speed down I’m going to try to make that arrow go from the right to the middle or the left to the middle and I’m going to do that using the shutter speed because that’s because I’ve picked what aperture I want.
Capturing Motion with ISO
If I have a 2.8 and I can’t go any wider on my aperture and I’m at say one over 200 and I can’t go any slower with my shutter speed because I’m worried there’s going to be some motion shake in my picture then the last thing I can do is my weapon of last resort right I can grab my iso and I can change that now to get to move the arrow back towards the middle.
Keeping the Exposure Triangle in Harmony
So think about this we’re keeping everything in harmony we pick where we want to start off with whether that be aperture or shutter speed and then we manipulate the other factors iso being the last one we touch in order to get that arrow from the left or the right back into the center.
It is your camera, have fun with it, try different settings on it, and if you like this blog and found it to be useful give me a big thumbs up Leave a comment down below.
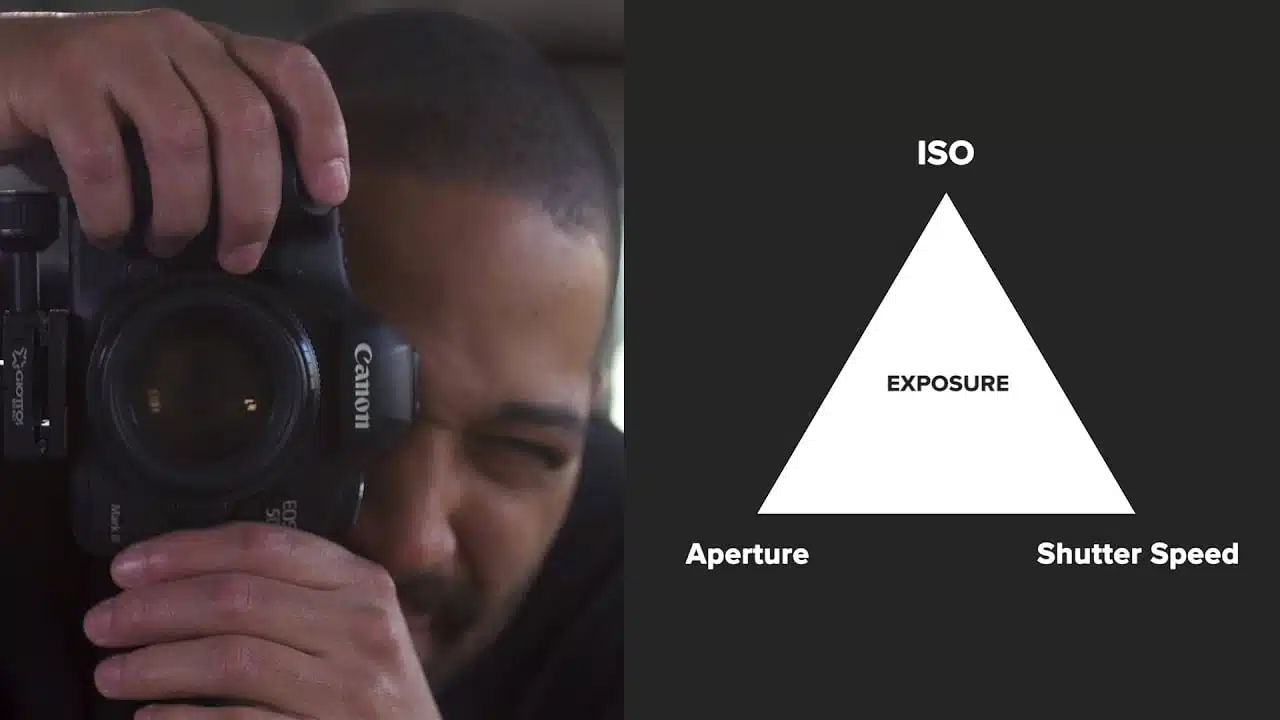


So it’s all about the Exposure Triangle. You do need to keep balance between Aperture, ISO & Shutter Speed.
Thank You. So Very Helpful.
I gotta question. The appropriate aperture for the camera??
There isn’t one single aperture for your camera. It depends on the kind of shot you are doing and the style that you are going for.
You make it so easy to understand. Thank you for that! Greetings from Netherlands.
Once you start shooting in manual, you get to know more about your camera.
Great information for a beginner photographers.
Great Article.
Manual mode par composer mode kaam krta h?
Best explanation over the topic. Till now I was not even aware that on which mode does it work. Quite dumb I know. but thanks to your video now I am aware of one more thing that I can do with my camera… Keep up the good work.
hey! I am using Nikon d5300 .what is the use of exposure compensation in manual mode because my camera let me change it even in manual mode
Sir outdoor portrait k liye konsi mode perfect hay…?
Can you please discuss 3 types of canon lenses USM, STM & IS II.
I just confused about those lenses
Sir, can you tell me which flash will work in canon200D mark 2?
nicely described.. thanks. please tell me how to shoot sharp photos in low light with an 18-55 lens. which mode is required. I am a hobbyist photographer, a beginner. I have a canon 1300 d.
how to shoot subjects which are backlit…??
What about low light/dark/night ??
In the video you fixed iso to 100 so
I can understand this thoroughly. Thanks.
Does exposure compensation work in manual mode?
Can I use exposure compensation in manual mode if I use auto ISO? (especially for Canon body, as I know this is possible in Nikon )
I like your tutorials. Please make a blog on food photography. And how you can take benefit of macro extension tube in food images and videos.
very well explained
I have got a question. The appropriate aperture for the camera??
Excellent explanation, very didactic
the best explanation so far ????????????
OMG, I JUST GOT MY CAMERA SHOTS GREAT. THANKS, A LOT.
Thanks!! This was very helpful!
Awesome explanation – thanks!!
awesome confusion clear hogaya ab
I have a canon 1200d I took pic but it has no color as I took in my fone. plz shortly explain
Sir Nikon af 50mm ye camera aacha hai beginning photographer ke liye
sir mairai pas d90 18–105 cemera 2hand abhi liya hai mairai liyai kya sambhavana hai ki mai photography sikh paunga
Nikon D500 how to NFC WiFi work sir PL.
sir.cinematic video ke liye canon 5d mark 4 ke liye kam badget me konkonsi lense lena jaruri hai . aur achha result de….khas kar 70-200.
Sir maine recently d3400 liya h P mode me day time me v bahot dark photos aa raha h mujhe aur kya settings Karna chahiye